Showing posts with label Traditional Blocks. Show all posts

Sunday, January 22, 2017

Simply Sweet (1/2017 FNSI III)

I can't believe I finished this quilt top in a weekend!  Of course, I did not finish the laundry and some of the housework!

(I  need a design wall, but I no longer have a good place to put it.)

The four patches were pieced from a charm pack of  Northcote Range (Moda) in 2012.  They were done shortly after the assault/brain injury, and I don't know why I didn't finish them sooner, except that life became even more complicated, and I just persist in designing quilt after quilt in my head, and it takes much, much longer to create a real quilt.


This did take many more hours than I would have predicted.
 The four patches include all but a few of the charms from the pack, because the stripes were large and wouldn't have worked.  Five strips of seven 4-patches.  The rose on white strips were cut 2.5 inches, and the borders were cut six inches. And now that it's all assembled, it still reminds me of quilts from my childhood, except that where I grew up in the Midwest most of the quiltmakers at that time would have used a solid white instead of the rose print.  I just love that rose print.  I also have another pack of the charm squares, but not enough of either the blue or the rose print to make a twin to this quilt.  It's about 46" by 56", and will be smaller after quilting. I don't have yardage that will work for the back (imagine that!), so it will be a while.

It's so quietly sweet and simple. So, I'm naming it Simply Sweet.
While it's just the top, I'm going to count it as my first finish of 2017.  It was good to focus on this quilt top instead of other things, like the national news, for example.  (I'm pretty sure there has never before been this kind of ugliness this long after a Presidential election within my lifetime.) And while I was praying for whoever will receive this quilt, I'm also praying for my 20 year old nephew Thomas who's been hospitalized in Houston.  So, good use of my weekend.

Back to work tomorrow, and expecting more winter weather.

I linked to Freemotion by the River, Let's Bee Social and My Quilt Infatuation.

Happy quiltmaking and creating,

Sunday, November 27, 2016

Which Flying Geese Method Is Faster?

Because I decided to add flying geese to the fishing panel, I was curious about which of my usual three methods was faster.
I did not try the "four at a time" method, because I didn't think I wanted four of each fabric.

I have Eleanor Burns Flying Geese 3x6/1.5x3 ruler, so I tried that method.  Here are the steps in photos:
 Eleanor's method is extremely accurate and starts with two squares of different sizes.

 Stitching 1/4" on each side of the drawn pencil line.

 Cutting on the pencil line.

 To my small homemade pressing board, which is why there are lavender stripes.

 Pressing seams toward the background fabric.


 Laying them edge to edge and drawing diagonal pencil line.

 Pin and sew 1/4" on each side of line.

 Cut on pencil line.

 Note space between flying geese.

 Align ruler with flying goose and trim.

 Do the same for other goose.  The rotating mat was quite helpful.

The other method I tried was to cut goose fabric into rectangles and background fabric into squares.
 Strips of background.
 Sub-cut strips into squares.

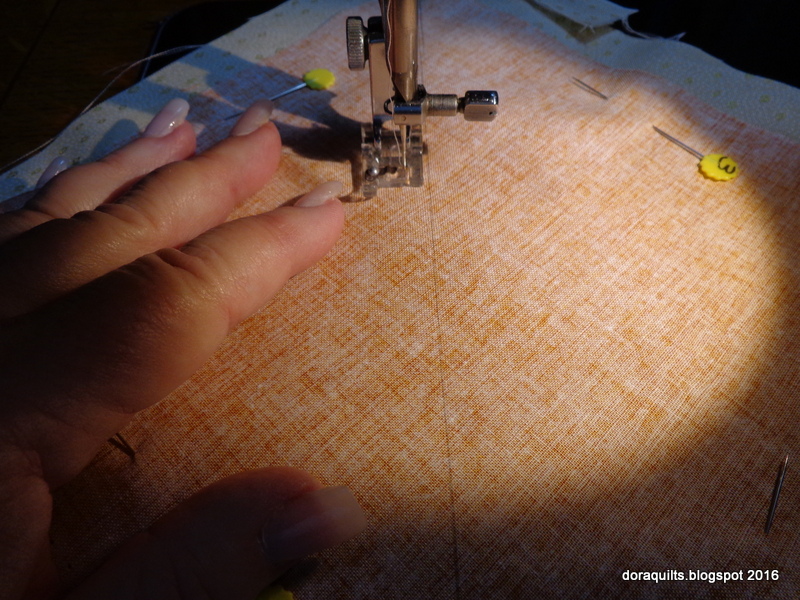
 Align tape with needle.  Ruler helps be sure the tape is perfectly aligned.  (My Jansjo light from Ikea is reflected in the ruler.  Sorry about that, but it gives me a chance to mention how much I love using those lamps; much better than the lights on most sewing machines; of course, there are no lights on my treadles.)

 Place background square on goose rectangle and sew diagonally across square.

 Keep corner of square aligned with the edge of the tape.

 Oops!  Be sure to insert sewing machine needle in the correct place and do not try to just chain feed without lifting presser foot.


 Ripping/frog stitching tip.  Place the red ball of the seam ripper on the underneath side and keep the longer tip on the top of the fabric.  Much faster to rip, and since I don't use dull seam rippers, I don't have to worry about cutting fabric instead of thread. (If you've not tried this, do.  You'll love it!)


Trim seam allowance and sew the second square on. Check against Eleanor's ruler.

Verdict:  The second method saved over five minutes per pair of geese.  The second method also gave me four more half square triangle blocks for some other project.  I make that seam before I press and trim off the excess.

I did sew together too many flying geese units on one side, so I used my ripping technique again.  I think most people have been taught to keep the red ball of the ripper on top, but ripping with it on the underside saves sooooo much time.

The other two methods of making geese are perfectly fine, but now I know which method is faster.

I have the fishing panel with its flying geese borders finished, and am waiting for batting and backing to arrive. While I was hopeful that my college girl would hold it so I could get a photo while she was home for Thanksgiving, that didn't happen, but we had a joyful Thanksgiving.
I need to figure out a way to create a wall for taking photos of my quilts somewhere in this small house.  I've photographed a lot of quilt tops and quilts outside, but with winds up to 55 mph today, the outside is definitely not a choice. (Driving to and from church was a bit unpleasant today; we're experiencing the first of three consecutive storm systems.  Hopefully, they'll be through here by Thursday or so!)

Happy quiltmaking, knitting, sewing, and crafting,

Friday, August 10, 2012

Barbara Brackman's Block Base Now Available

I wanted to share with quiltmakers who may not have gotten the word, that Barbara Brackman's Blockbase is once again available.
Even better, right now Electric Quilt is shipping for free.  (Free shipping ends August 20, 2012.) You can order it here: http://www.electricquilt.com/Shop/BlockBase/BlockBase.asp

Here's my original copy of her Encyclopedia of Pieced Quilt Patterns.

 The pages came punched with three holes but loose.
 The right side page had little handmade drawings of the blocks while the left side listed names and printed sources of the blocks.  (Obviously, some blocks had even more names, but Barbara was documenting only printed sources.)


I'm excited because when it was available in the past, I was not able to place an order.   Over 25 years ago, my Tennessee quilt guild, the Cherokee Blossom Quilt Guild in Cleveland, TN was able to bring her to town.  The information she shared has served me well for over a quarter of a century--and she continues to learn more and to share more.

In the quiltmaking classes I taught for a chain of fabric stores (at a time when there were only a handful of quilt shops in the entire state), class participants learned to draft all categories of blocks in a twelve inch size.  (How often do I make 12 inch blocks now?....Not very often!)..Not that it matters, since the drafting skills they learned can be used to draft any size block.

I love this encyclopedia, but it lacks some of the functionality that eases our lives in the computer age.
Barbara shares some of the advantages of Blockbase in this post on one of her blogs.

Want to know the really cool part?...With all its increased functionality, the computer program sells for about the same price as the encyclopedia did back in the '80s!  In fact, with the offer of free shipping by Electric Quilt, you can purchase it for less than the cost with shipping over 25 years ago!  What a deal!

Happy quiltmaking....


P.S.:  If you came here looking for my tutorial about how to quilt on a treadle, you can find it here. Readers have left some lovely comments; I'm glad to know that even some people without treadles have picked up some helpful information from the tutorial!

Friday, April 13, 2012

What's On the Bed?

I changed the sheets and changed the quilt. So, I'm linking with all the other quilts at Bonnie Hunter's Quiltville.     I would love to see what's on your bed, so if you haven't already, please link to yours at Bonnie's blog.  I would love to see more.  (I've been looking at a few every day, and I think the linky party is open for a couple more days.)

This quilt is one of my all time favorites.  It's called Anemone and was made between 1992 and 1996.
 It was inspired by a quilt that had appeared in an old E. P. Dutton quilt calendar.  If I remember correctly, That Patchwork Place published a similar quilt in one of their books that was as much about history as it was about quiltmaking.
 This was made the old-fashioned way; drafting the pattern with pencil and compass, tracing templates on plastic, drawing around each one on fabric, pieced by hand for the most part.  The circles containing the sunflower were pieced rather than appliqued or reverse appliqued. It was set together by machine. 
 I carried little baggies of fabric, needle, thread, scissors, and thimble everywhere I went for several years.
 Aside from the colors, my favorite parts are the 3/4 compasses at each corner and the 1/2 compasses at the center of each border.

 I like the fact that the blocks are all different and that the fabrics are from many fabric lines. While there are quite a few Hoffman fabrics in this quilt, it also contains fabrics from SSI, P&B, Alexander Henry, and quite a few other manufacturers.
I'm pretty sure I started it when I was living in Gallup, NM and continued working on it when I moved to Arizona and back to NM.  While in Gallup, I was part of a great quilt guild, and had been in Arizona for a while when I received a call alerting me to the fact that my name had reached the top of the list to have one of my quilts quilted.  I finished assembling the top, carefully drafted a feather border, purchased more fabric for the backing and sent it off with my favorite (at that time) batting, Mountain Mist Quilt Light.

I can still see some of the white pencil I used in the feathers; and I'm certain my name was uttered less than favorably many times during the quilting process.  One of the reasons this quilt is so special to me is that so many very special friends helped quilt it, too many of whom have now passed on.  (One of my Sweet Teen's middle names is Margrette for one of the many dear quilters who befriended me when I lived there.)

Ah, the sweet memories of sweet blessings that live on in our quilts.......


Wednesday, November 23, 2011

Hunting Quilt

 What is this mess?  The trimmings from squaring up 48 half-square triangles.  Next time I'll use my old Omnigrid triangle rulers.  I forgot how much I dislike trimming squares.
Piecing done on my lovely vintage Necchi BU on the treadle from a 1919 Singer 66.  (I do still have the Singer 66, and it works fine, so I should find someone who would like to use it.)


Turned the triangles, 48 two-patch blocks, and 12 solid blocks into 12 Lincoln's Platform blocks.

 I drew diagonal lines across 24 squares.  (They're resting on a sheet of 12" deli paper.  I love that stuff--for sewing and organizing as well as in my kitchen!)
 I placed those squares on opposite sides of an un-pieced square and sewed on the line.


 ....Over and over again....
I love the hunting fabric, a gift from my dear friend Mary.  (It was a JoAnn's Fabric exclusive several years ago, but until this inspiration hit, I couldn't figure out how to use it.)
 Pressed the seams with my favorite itty-bitty steam iron--at least it's my favorite for piece work.
 All pressed.

 Trimmed--I often sew a second seam a scant 1/2-inch to the right of the line before trimming--not sure why I didn't do that before trimming this time.
 Lay out the plan.  Lay out two stacks of blocks.
 Seam, referring to plan.

 Check to be sure seams of blocks align.  The red in the Lincoln's Platform is a Robin Pandolph from several years ago. The little flowered red is a Peter Pan--I'm wondering if it was left over from a shirt I made for my father many years ago.  The beige tiny flower is from the 1980's when it was still hard to find 100% cotton for quiltmaking.
 Build the rows and piece rows together.
 Piece red inner border.
 Layer and baste with a few hundred pins.  (Pin basting because I took it to church to baste at our Victory Quilt meeting, and I didn't feel up to carting along the boards I use when basting with Sharon Schamber's thread basting method.  In hindsight, her method is faster--and is featured on you-tube.)


Pieced back--with some little surprises.

Ready for quilting.  Makes me nostalgic for hunting season on the farm in Illinois--although I usually stayed inside since there were always a few poachers who thought a hunting license entitled them to free game from other people's land and that they didn't even have to ask permission to hunt.  One year those poachers even included the president of one of the El Paso banks!
Guess I'd better get busy quilting and see how many more memories I recover!

Most often our Thanksgiving dinners included pheasant. On one of the little country roads near my work, I've seen a pair of ring-neck pheasants each day for the last several days. I don't even know if there is a pheasant hunting season here in New Mexico.

Hope your Thanksgiving Day is wonderful!

Related Posts Plugin for WordPress, Blogger...