Showing posts with label People-Powered Sewing Machines. Show all posts

Sunday, November 27, 2016

Which Flying Geese Method Is Faster?

Because I decided to add flying geese to the fishing panel, I was curious about which of my usual three methods was faster.
I did not try the "four at a time" method, because I didn't think I wanted four of each fabric.

I have Eleanor Burns Flying Geese 3x6/1.5x3 ruler, so I tried that method.  Here are the steps in photos:
 Eleanor's method is extremely accurate and starts with two squares of different sizes.

 Stitching 1/4" on each side of the drawn pencil line.

 Cutting on the pencil line.

 To my small homemade pressing board, which is why there are lavender stripes.

 Pressing seams toward the background fabric.


 Laying them edge to edge and drawing diagonal pencil line.

 Pin and sew 1/4" on each side of line.

 Cut on pencil line.

 Note space between flying geese.

 Align ruler with flying goose and trim.

 Do the same for other goose.  The rotating mat was quite helpful.

The other method I tried was to cut goose fabric into rectangles and background fabric into squares.
 Strips of background.
 Sub-cut strips into squares.

 Align tape with needle.  Ruler helps be sure the tape is perfectly aligned.  (My Jansjo light from Ikea is reflected in the ruler.  Sorry about that, but it gives me a chance to mention how much I love using those lamps; much better than the lights on most sewing machines; of course, there are no lights on my treadles.)

 Place background square on goose rectangle and sew diagonally across square.

 Keep corner of square aligned with the edge of the tape.

 Oops!  Be sure to insert sewing machine needle in the correct place and do not try to just chain feed without lifting presser foot.


 Ripping/frog stitching tip.  Place the red ball of the seam ripper on the underneath side and keep the longer tip on the top of the fabric.  Much faster to rip, and since I don't use dull seam rippers, I don't have to worry about cutting fabric instead of thread. (If you've not tried this, do.  You'll love it!)


Trim seam allowance and sew the second square on. Check against Eleanor's ruler.

Verdict:  The second method saved over five minutes per pair of geese.  The second method also gave me four more half square triangle blocks for some other project.  I make that seam before I press and trim off the excess.

I did sew together too many flying geese units on one side, so I used my ripping technique again.  I think most people have been taught to keep the red ball of the ripper on top, but ripping with it on the underside saves sooooo much time.

The other two methods of making geese are perfectly fine, but now I know which method is faster.

I have the fishing panel with its flying geese borders finished, and am waiting for batting and backing to arrive. While I was hopeful that my college girl would hold it so I could get a photo while she was home for Thanksgiving, that didn't happen, but we had a joyful Thanksgiving.
I need to figure out a way to create a wall for taking photos of my quilts somewhere in this small house.  I've photographed a lot of quilt tops and quilts outside, but with winds up to 55 mph today, the outside is definitely not a choice. (Driving to and from church was a bit unpleasant today; we're experiencing the first of three consecutive storm systems.  Hopefully, they'll be through here by Thursday or so!)

Happy quiltmaking, knitting, sewing, and crafting,

Friday, July 1, 2016

At Last! My Quilt

This quilt has been in the works for over a year, and in my head for much longer. When I started it, I named it Summer Romance I, knowing I also want to design and make a blue and white quilt that I will call Summer Romance II.

I'm now at the quilting stage--and I'd be quilting right this minute if I didn't need electricity and if we weren't having much needed thunderstorms.  (We're getting typical New Mexico three-inch rains--which means the drops of rain are falling about three inches apart.  We hope to do a bit better than that.)


You can find more posts about the making of this quilt top here and hereor just have a look at posts from July 2015.(although I'm pretty sure I started this Memorial Day weekend of 2015).

All but the white fabric in this quilt is from Eleonor Burns' Zoey line for Benartex.

 I'm quilting with several Glide threads from Fil-Tec, also known as Bobbin Central.

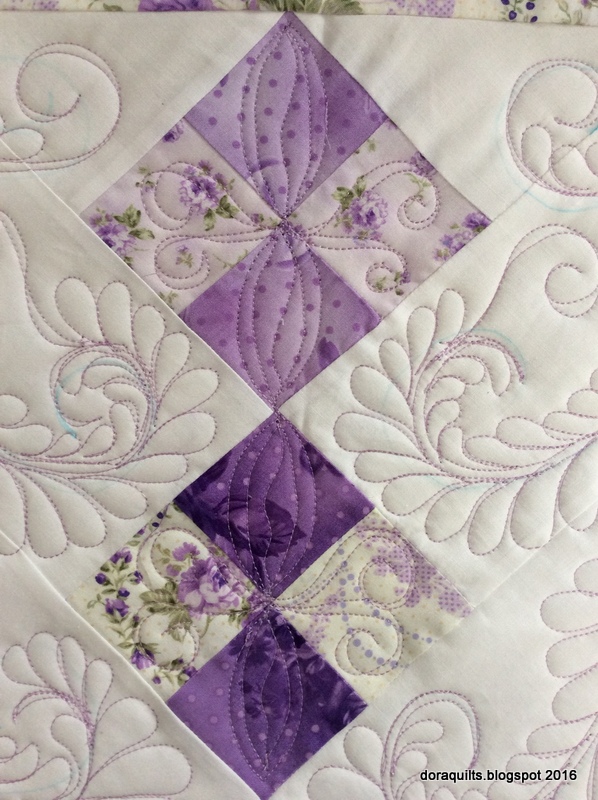
 I marked only the spine of all the feathers on this quilt so far.


 I made only general decisions about how I would quilt, so when I actually started, I needed a couple of homemade tools.  I used a piece of card stock to make the flowing spine above for a two inch wide border.
I cut the paper above to make a more unusual spine for the five inch borders.
I used a plastic lid to plot the spines in the outer border at the top of this post.


The main blocks of this quilt were inspired by a Blackford's Beauty quilt I saw in a magazine around 1983.  I've also seen this block called Snowflake, and someone said Bonnie Hunter has designed a quilt using this block. I didn't know that, and I don't think I'll go look at Bonnie's quilt until I'm finished.  In any case, this is now my block in a unique setting with lots of room for the quilting to shine.

I wanted to get this quilt done ages ago, and I was thinking I could finish it this weekend, but since I'm using electricity instead of a treadle to quilt this,  I have to unplug whenever there is danger of lightning in order not to risk a power surge frying my machine.

I did get to spend a lovely morning (or most of it, anyway) at Dough-Re-Mi Bakery & Cafe catching up with a friend and getting an original quilt she'd like me to quilt very soon--as soon as Summer Romance I comes off the machine.

The last time I checked, the Dog Head Fire was at 96% containment, so we no longer have to worry about that, although we continue to pray for the people who did lose homes.  Despite the devastation, there was one family church still standing although everything around it had burned. Another fire started on the other side of the mountain yesterday, about 11 miles from Tajique.

If the stormy stuff continues, I need to go work in my sewing room and, with luck, put those treadles to use!

Happy quiltmaking and knitting,

Friday, February 27, 2015

Candy for Quilters & What Mountains?!

I don't have another finished quilt, but hope to have one soon!
I do have some Candy for Quilters!

I started calling Fil-Tec Glide thread "Candy for Quilters" several years ago--because that's what it reminds me of--minus the calories of real candy, of course.

 At some point Fil-Tec started calling it "Candy for Quilters" too.  This is my latest order, which arrived Wednesday, but I didn't want to fight with the hard working local post office people and didn't have the tracking number with me, so I had to wait until I got home, just after they closed, to look it up.  I found out they had communicated "attempted delivery" to the shipper, but they hadn't really attempted delivery, because they didn't put a card in my post office box.  However, I was able to pick it up yesterday.

In addition to the 5000 meter spools, I ordered some Magna-Glide Classic bobbins, size L.  I chose colors I thought would most readily work on some awaiting quilt backs.
(I do have some crystal candy dishes/plates somewhere, but this favorite old Taylor Smith Taylor saucer is also one of my favorites.)

I do use these bobbins in my vintage sewing machines.  The magnet side goes toward the metal on the bobbin case (but probably would not have to if the bobbin threaded differently).  The magnet keeps the bobbin from spinning out of control when I'm going fast and just feeds very evenly through the machine. They've done well in my class 15 machines as well as in my machines that use a class 66 bobbin.  I haven't tried them on a Singer Featherweight because that uses class 60 bobbins, and is much too small for me to quilt on--yes, I've tried to quilt on it.  I'm sure I could set the stitch length at zero since the feed dogs don't drop.  But I'm just not a fan of tiny projects, so I've never done that.

Yes, I could wind Glide thread onto bobbins and have often done so, but the pre wound ones are wound more tightly and are ready to pop into the bobbin case.

Now for the mountains....there are none visible today!  I live on a high plateau, sometimes called the llano stacado and sometimes called the Estancia Valley.  We're about 6200 to 6400 feet in elevation and surrounded by mountains.  However, we are in the midst of our third/fourth storm this week and have thousands of feet of clouds and a bit of fog and, currently, snow.  The snow is so low that doppler radar is reporting it's not even here.  The mountains surrounding us are all hidden today. (When the mountains disappear, this little town reminds of the little town in Illinois near our family farm.) We have icy, treacherous roads, and more snow.  I got up very early, recognizing I'd need to do some shoveling.  There is a lot of ice under our snow.  I was worried about getting even to the highway, let alone 40 miles down the interstate to my school.  "Down" doesn't quite describe the commute because first we have to climb several hills (which are like mountains back east) and then descend into the city of Albuquerque. Albuquerque  posted two-hour delays for the East Mountain schools and within a couple of hours posted that they would be closed. Then the district I live in posted a school closure.
The state of New Mexico had already posted difficult driving conditions and some road closures.  The police in Albuquerque began closing streets/roads/interchanges due to ice.  Eventually Albuquerque Public Schools cancelled school for today.  Their closure then triggered the closing of a large number of private and state chartered schools as well as Central New Mexico University and the University of New Mexico.

Perfect license for quilting--except I need to do a lot of other things around the house too.  I really hope I accomplish a lot. Perfect day for a few pots of hot tea too!

May you all be warm, safe, and well-fed!

Happy quiltmaking and knitting,

Wednesday, July 9, 2014

Prayer Quilt in Progress

I have finished piecing the quilt top for the prayer quilt made with Pepper Cory's studio e Peppered Cottons.
 Because the new colors aren't in shops yet, I used a Moda "Grunge" for the outer border.

Yesterday we overslept and arrived at the college to find I'd left my Kindle at home.  Fortunately, I did have my quilt sketch book, so I played around with some ideas for the quilting.
 I'll be ready for that part as soon as I decide on backing and piece an extender into the yardage.

This is the quilt for which I made a "small" to help me make decisions about thread colors and quilting designs.


We are so grateful for the rain we have received, but it resulted in a need to shorten the treadle belt.  I removed less than 3/4 inch, but it's sewing so much better. (There are instructions for how to do this under the Tutorial Tab above.)

I have the photos taken for a tutorial for the Sweet Loreta Quilt, and I plan to get to instructions soon.

I learned that the New Mexico block I blogged about for the American Made Brand blog tour never arrived at Clothworks, so I've almost finished piecing a new one.  AMB is sending me enough of the fabric I used in the border to finish it.  That will be a quick project once it arrives.

The temperature has dropped here.  We've had thunder, although we currently have thunderheads and sunshine. Today's storms, and, let us hope, rainfall, are brought to us courtesy of our monsoons--and that, too, is good news. I know that the proximity of lightning often means people have to unplug their sewing machine and longarms. My treadle will just keep on stitching, and I love that.

There are several linky parties available.  I so enjoy meeting new quilty bloggers that I can add to my Bloglovin list and seeing what familiar bloggy friends are doing.  Today, I'm linking to.....

Happy quiltmaking....

Sunday, November 24, 2013

Tutorial: Dolly's Little Basket Blocks

This tutorial is for my grandmother's Little Basket Blocks, which finish to 6 inches. {Several dozen photos ahead.}


Today these are most often referred to as Stamp Baskets, because they appeared as a set of four on a U.S. postage stamp in the late 1970's.  I've seen at least a couple of other variations referred to as Stamp Baskets.  We are making sets of four 6-inch [finished] blocks.  Some on-line friends and I have decided to piece these on our PPMs [People-Powered Machines].  Of course, it is possible to make these on machines with tails [electric machines], but treadling and hand cranking are just soooo much fun--and keeps those marvels of 19th and 20th century engineering and manufacturing doing what they were created to do.

Since I awoke to this this morning,...

it's the perfect time to stay inside, stay warm, sew, take photos, and write.  (Yes, the depth of the snow increased, making me so very happy that I do not have to drive to work! Since my church is 20 miles away, it seemed wise not to attempt that trip either.)

I did begin with a plan and recorded it in my journal:

Please come along and piece with me.  In the comments section below, I'd love to hear from everyone who joins us.


We need to cut these pieces as stated and shown above, plus a blue piece of bias two inches wide and long enough to form a handle with plenty left over. (Please note that the reason the tips of the triangles are missing on some of these triangles is that they were cut from a strip of fabric with a triangle ruler.)


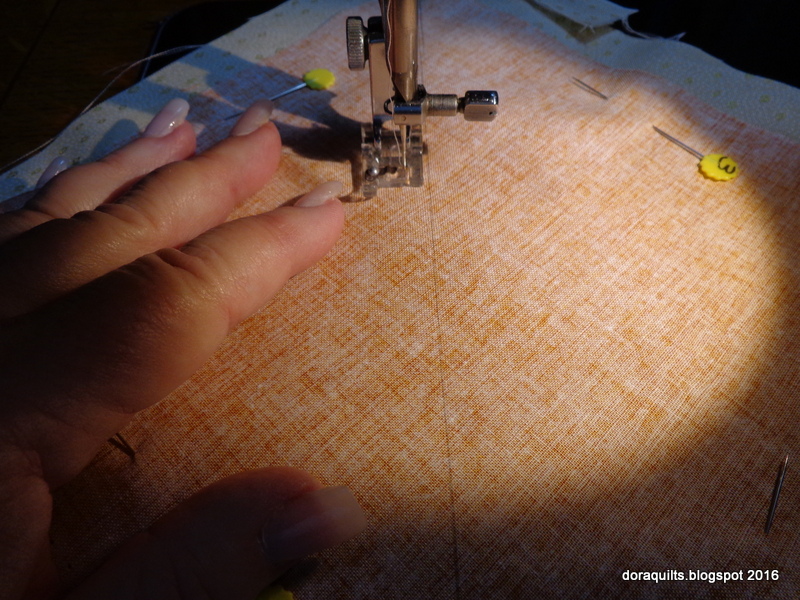
 I'm piecing on a Necchi BU from the early 1950s set into 1919 treadle irons. When I piece on vintage machines for which I do not have a 1/4" foot, I just use a quilting ruler lined up with the needle on the 1/4 inch line, making sure the ruler is parallel to the stitching line and the left end of the machine if it has a rectangular bed, and then scootch multiple pages of a Post-It note pad next to the ruler to guide my fabric.


First, we fold our strip of bias and sew the cut edges together with a 1/8" seam.  Of course, you may choose another width, but if you use a strip that is wider, it may be best to cut it to the shape and size you prefer and applique it in a more traditional way.

I did not press the folded edge because this fabric was just a bit stiff to begin with, and I wanted it to cooperate when I was ready to applique.

2. We fold our 6 inch background triangle in half so that it's "legs" are aligned...


and finger press the center, being careful not to distort the fabric since this is a bias edge. It can be helpful to lightly finger press that outer corner too.


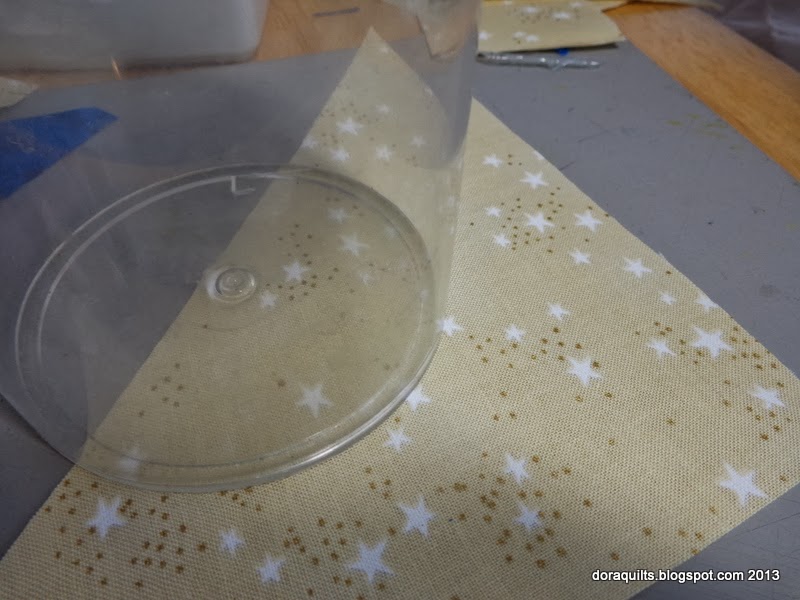
3.  We're going to mark the path for handle placement. I'm using an empty plastic jar (the kind in which I usually store my quilt basting pins).

 This particular jar has the added bonus of having a molding mark that I can place on the fold I finger pressed. [The diameter of this jar is 3.25 inches.  I'm not sure how important it is that someone use the same size circle and same width handle.  I'm thinking part of the charm of these blocks will be that each set will have some slight variation in the handles.]


 4.  Mark the jar's circumference.  I used a water erasable blue pen, but a fine lead pencil would work as well.  (The line will be under the bias handle, so it won't be visible.)


5.  Next we place the seamed edges of the bias against the marked line, ease it into a curve, and stitch it down.


 If we stitch just a hair to the left of the previous stitching, no stitches will be visible when we are done.


 We do need to be careful not to distort the background while we are stitching.


7.  We trim off the extra bias strip, leaving a bit of excess at the end.


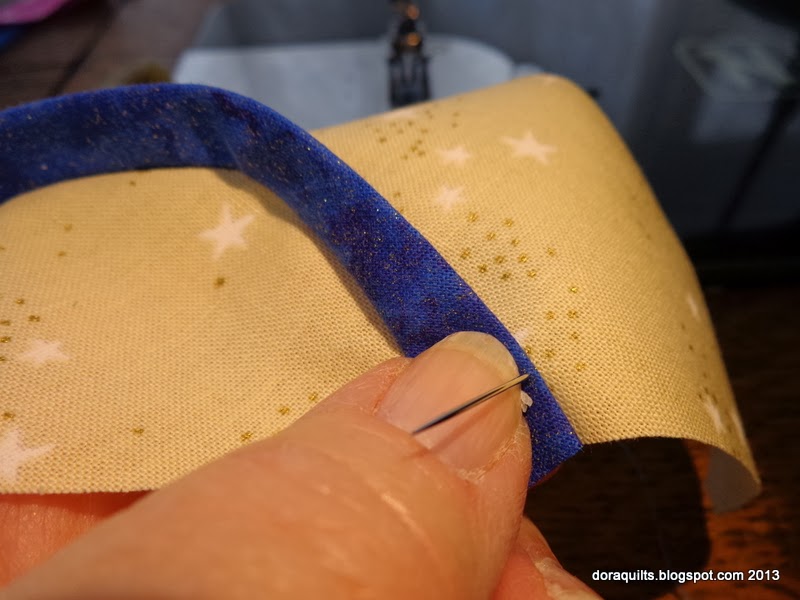
8.  We finger-press the basket handle toward the corner of the block.  Yes, we could use an iron.  [I didn't.] At this point a) we can top-stitch the outer edge of the handle, demonstrating the beautiful, even stitching of our antique and vintage machines; b) we can secure the outer edge with a narrow zig zag if we have a machine with that capability, or a zig zag attachment; or, c) we can hand applique that edge.


 I chose the latter, so I got out my antique silver thimble that a sweet lady in Tennessee gave me when my grandmother'silver thimble disappeared.


 I threaded a size 8 or 9 between [because that's what I had]; some people prefer sharps.  I ran 10-14 inches of thread over a chunk of beeswax.  Hint: most often we try to match our thread to the appliqued piece.  A single ply of high-quality embroidery floss run over beeswax is quite strong and can get us a closer match.  (I used a much lighter thread, hoping to be able to show more detail in the photos.)


 I wrapped the thread around the needle three times [tip of thread facing the eye of the needle], held the "wrappies", and pulled the needle through for a nice sized knot.


 I brought the needle up about 1/2 inch from the triangle edge, through both layers of fabric.


 One of the tricks to nearly invisible applique is to put the needle back into the fabric perpendicular to the spot where it came up through the applique, and then bring it back up through both layers of fabric about 1/8th inch to the left.


 Despite the much lighter colored thread, these stitches are nearly invisible.


 With a little tug after every three stitches or so, they become even less visible.  The trick when tugging is to be careful not to distort the background triangle.


 We continue until the applique is done and knot off on the back (about 1/2 inch from the triangle's edge).


 9. I pressed with steam.  Some people believe steam will distort the fabric and would never use it.  (I was careful.)


 We can see there was very little distortion.  However, there was enough to justify doing the applique on a larger triangle.

10. Our next step is to align the triangle ruler with the bias edge and trim ever so slightly.


If our finger-pressed bias line to the outer corner has disappeared, we can finger press it again.

We want this triangle to finish to a four and one-half inch size, so it needs to be trimmed to five inches (taking care to have the handle centered on the long diagonal side of the triangle).

 11.  Next we layer the appliqued triangle on top of the largest basket triangle.


12.  When we have them perfectly aligned, we take them back to the sewing machine and sew our scant 1/4 inch seam on the longest side.


13.  Once the seam is sewn, we lay the pieces with the basket fabric on top, and finger press the seam open.


 14. We trim off any little dog ears in the seam allowances.


15.  If we have any doubts at all about the accuracy of our seam allowances, this is the time to be sure that this portion of the basket measures exactly five inches square, because it will need to be 4.5 inches square in the finished block.

16. We align our two small triangles with our small back ground rectangles.


and place right sides together.


We seam across the short sides of the rectangles,


trim off dog ears,


 and seam our new shapes to our main basket square, finger pressing as we complete each seam.


After sewing each side to the larger triangle square, we trim more dog ears.


17. We check to be sure we have that nice junction where the two triangles meet the main part of the basket.


18. We lay the remaining background triangle over the basket base.


and seam so that our needle crosses the previous seams where they joined (which is why the blue basket needs to be on top).


19.  We check the junctions of our seams and trim more dog ears.


 21.  We check to be sure our seams match up at the base of the basket

and that our seams along the edges are crossing 1/4 inch from the edge of the patchwork.


22,  If so, we gently press the finished block and check with a quilt ruler to be sure it measures 6.5 inches so that once it's seamed to other blocks, it will measure six inches square.

23. We also need to be sure that where the seams turned toward the lighter fabric, there is no dark shadowing where the edge of the blue seam allowance managed to be wider than the light seam allowance.  If so, we'll trim that extra blue with some sharp little scissors so we can banish that shadow.

For much of the work on these blocks, I used a triangular Omnigrid ruler that I've had for a couple of decades.  I do not know if it is still being marketed; I haven't seen it in stores, but seldom look. I know there are a variety of other businesses that market similar rulers.  Readers who can recommend triangular rulers are welcome to do so, and I will update this post with their recommendations.


Our group has decided we will each make four sets of four blocks to exchange; some of us will make an extra set to give us a finished collection of 20 six inch blocks.


Since these blocks are so small, we're considering a separate more simply pieced signature block with our name, the machine we used, and where we live.  When that decision is made, I'll post how to do that.


The quiltmakers originating this exchange are members of the Treadle-On community; we sometimes call ourselves "Onions," which is short for "Treadleonians," a title that seemed perfect after it originated in a member's misspelling many years ago.


Fellow Treadleonions can find information about this block exchange HERE. (Some of our Onions may wish to use some alternate techniques, which will be fine as long as the completed block measures 6.5 inches square so it can finish to a 6-inch block once it is set together with other blocks.)               


We are using low volume prints as our back ground.  You can find a post about those HERE.


If other individuals or groups, on-line or off, decide to try these, we'd love to hear from them.


I don't have enough of these blocks done to have them on any design wall except the one in my mind; nevertheless, I'm linking to Judy L's Design Wall Linky over at Patchwork Times. 

If you wish to leave a comment and are unable to do so, you may e-mail me at 4dscheer [dot] quiltmaker [at] gmail.com or use the comment form near the top of this page on the right.  If I receive too many spammy comments, I'll just remove the gadget.

Happy quiltmaking.....

Related Posts Plugin for WordPress, Blogger...