Friday, January 25, 2013

Scone Variations

If you've been reading my blog for a while, you probably recognize that I love cooking for people I love--although if you remove the people I love, I probably wouldn't enjoy it nearly so much.  (I guess I will find out next year when Sweet Teen heads off to university--although I may just find some more people to love.....)  In any case, I love the comfort of home baked breakfast treats on the weekends.

Here's my recipe for scones with a bit of a nutritional boost.

 Preheat oven to 400 degrees F.

Mix these dry ingredients together in a medium to large mixing bowl:

 2 cups flour
1/2 cup ground flax seed
1/2 teaspoon salt
1 Tablespoon baking powder

You can use 1/3 cup brown sugar and mix it into the dry ingredients or 1/3 cup blue agave syrup and mix it into the following ingredients:

1-1/2 cups heavy whipping cream plus 1/4 cup water
OR
1-3/4 cups half and half
1/2 cup dried date pieces (or 1/2 cup any dried fruit)
2 tablespoons freshly grated orange peel or 1 tablespoon dried orange peel

(Optional: mix 1 teaspoon of pure vanilla extract into the cream or half and half.)

Pour over dry ingredients and stir until mixed.  Then using hands, finish mixing ingredients in mixing bowl or turn onto a floured board and finish mixing (using hands).

Shape into 15 to 18 balls of dough and flatten slightly.  Place on Sil-Pat, Flexipat, or on a cookie sheet or jelly roll pan that has been sprayed or rubbed with grapeseed oil or olive oil.

Optional:  Using silicone brush, paint tops with cream or half-and-half.

Bake for approximately 18 to 20 minutes until golden (and toothpick inserted into center of scone is removed clean).

NOTE:  We live at 6200 feet, so our flour dries out quickly, which means you may need less liquid closer to sea level.

You could use granulated sugar or honey just as easily as blue agave syrup.  I like the blue agave syrup because it is metabolized more slowly.

If you prefer traditional wedge-shaped scones, you can pat the dough into a circle about 1/2 inch thick on your pastry mat and cut into wedges with the edge of a dough scraper.  (I like the round shapes because they cook more evenly than the wedge shapes.)

If you decide to make fewer but larger scones, you may need to add a  bit more baking time.

 These are wonderful served with softened cream cheese, creme fraiche, or orange marmalade (or even a spread of cream cheese, marmalade, and a few more date pieces). Left over scones can be stored in a one-gallon ziplock bag.  To reheat, wrap two scones in a moistened paper towel and heat in microwave for 20 to 30 seconds.  This wet-wrapped reheating will also soften scones that have lingered for several days.

If you try these, please let me know how you like them. They are so easy to make and so much less expensive and more delicious than the ones you can buy at bakeries (and can definitely be ready to eat in less time than it would take to walk or drive to the bakery and back).

Okay, we should get back to quiltmaking, or at least I should.....

Thursday, January 24, 2013

A "Shiny" Quilt Top


This unfinished quilt top was in with the donated fabric we needed to sort at Saturday's gathering of our Victory Quilt ministry.
It looks like it's mostly rayon acetate with some occasional patches of silk.  All the patches are rectangular.  It was pieced by machine, and then the maker hand stitched a running stitch along the edges of some of the patches.
 I'm thinking it could be layered with a cotton backing and fusible batting and machine quilted.  I'm wondering if anyone else has tried something like this, and, if so, were there any pitfalls or recommendations.  We have no idea who donated it (people frequently just leave things for us), so I doubt that we'll ever know whose work this is, but I'd like to make it into a quilt if that's feasible.

This top is small enough to be quilted fairly easily on a domestic sewing machine.

Comments more than welcome!


Happy quiltmaking,.....

Tuesday, January 22, 2013

Saturday Victory Quilting

Saturday was our monthly meeting for Victory Quilters, our prayer quilt ministry at Mountainside United Methodist Church in Cedar Crest. Here is the visible evidence of what I accomplished.
 Actually, my accomplishments were nothing to brag about.  I managed to cut about 28 strips from seven fabrics.  Four of these fabrics are gifts from my friend Mary, who often sews bindings on quilts for our ministry.  The gold and two violet fabrics are from my stash.  I then sewed about four pairs of strips together on my 1952 Singer Featherweight.  (The Featherweight was a gift from my friend Harriet almost 25 years ago.)

Yes, I was side-tracked.  Someone had donated several bags of fabric that we had to sort.  That took a little while. Then I decided my Featherweight foot control needed a little "souping up" because it was sooooo slow.  (I found out about someone who was horribly badgered and threatened with being banned from a sewing machine list because she called a foot control a "toe pedal."  Actually, when it comes to sewing machines, I understand that "toe pedal" has been used in the South for a long time, something that must have escaped the attention of the person who wanted to ban her. I'm so happy to see people using vintage and antique machines that they can call the FC just about anything and I'll still be happy they are using their machines!) 

I did not get this toe pedal "souped up" enough, so I have a phone call in to my friend Bobbie (who definitely lives in the South), because she's had a lot more experience than I at souping them up!--I've done it, but it was nearly 25 years ago, and I remembered a lot more before I got kicked in the head!  My machine has a new-old foot control, which is now a year old, courtesy of Rocky, the Sew-Man, also known as an OSMG, who lives nearby.  I need to get this machine moving more quickly.

In other news, I've decided that when I take my Sweet Teen to youth group, it makes no sense to drive home and have to drive back to get her or to let someone else bring her home (because they always lose track of time and then I worry).  Although I consider myself little more than a beginning knitter, people frequently ask me if I'll help them learn to knit.  I'm thinking we need a Knit-Tea Night.

That would give me a chance to chat with others while I'm knitting and waiting for her.  It would give other parents and grandparents something pleasant to do while they are waiting for their children or grandchildren.  Furthermore, it would give anyone who wanted something pleasant to do at the end of a work week the chance to unwind and untangle from work challenges while doing some handwork.  We're calling it Knit-Tea Night, asking people to bring some knitting, crocheting, embroidery, tatting, etc. and a favorite teacup and saucer or mug, and just spend a pleasant hour or two stitching and relaxing.  (One woman at church told me if she brought knitting, she would be anything but relaxed!  Hmmmm, I think looking at a pretty magazine like Victoria or Southern Lady or Tea Time or even an e-reader might work!)

Happy quiltmaking,......

Monday, January 21, 2013

Travelling Bag for My Featherweight

Over the last few years I have purchased several insulated cooler bags (shoulder bags) that looked like they would be perfect for transporting my Featherweight when I take it to quiltmaking gatherings.  Each time I would bring the bag home and discover there was one tiny measurement that was inadequate.

Friday night, when I woke up in the night and was thinking about  Saturday's Victory Quilt meeting, it occurred to me that about 4.5 years ago, we purchased a rolling cooler for our long summer trips.

 It fits!
 The sewing machine, foot feed, and the base of my thread stand fit comfortably in the main compartment. (I sat the machine on a terry cloth towel to make it easier to lift in and out.)
 Beneath the top lid is an insulated compartment that perfectly holds my tools.
The little striped tin box holds scissors, needles, rotary cutter, etc., a cone of thread, my extension cord folded into an old paper towel cardboard core, a bobbin box, and a role of rubberized shelf lining to keep the sewing machine from slipping on the table and a piece to keep the foot control from slipping around on the floor.
It also has a pocket on the front that would hold more tools (I stuck in a box of green tea).
This is a wheeled cart with extendable handle, so it makes getting from the house to the car and the car into the building a much easier trek.  Of course, I did have to go back for a second trip to bring in the cutting mat and my rulers. I transport my rulers in a large see-through zippered bag that I think originally contained a duvet--so it's long enough for my 24-inch ruler as well as a variety of smaller ones.

And to think I've had the container just sitting in the utility room.  It's going to be getting a lot more use.

One more goodie: Courtesy of Fiber Obsessive, here's a link to faux piped binding http://www.52quilts.com/2012/05/tuesday-tutorial-susies-magic-binding.html 
I'm glad to see it since another post I used to refer people to was removed from the web.

Happy quiltmaking.....

Saturday, January 19, 2013

Prayer Quilt Dedication

Last Sunday we had another prayer quilt dedication at our church.  Here are a few glimpses of the 50+ quilts now ready to go to people facing some serious health challenges.


I really thought I'd contributed no quilts--mostly because I just haven't had the opportunity to work on prayer quilts for the past more-than-a-few months.  However, I saw several that included my work.

Now they will be dispensed over the next few months.  I absolutely love hearing from people who relate to us the blessings they experience as a result of this ministry.  The Lord uses these quilts in wonderful ways.

Happy quiltmaking....

Thursday, January 3, 2013

Happy 2013, plus Quilting Progress

Wishing all my family, friends, blog followers, and readers a happy year of faith and prosperity.
I
It began snowing here at 8:00.  Big, fluffy snowflakes.
According to the weather service, the snow is missing us--and 7 miles to the west, it's not falling.
But it's beautiful here.
I've been missing from my blog because we've had over two months of unreliable connectivity.  I've been able to read for very brief periods--and I've tried posting a few comments from Sweet Teen's i-pad (much more complicated than using a keyboard), but otherwise I've just had to back off from the internet.  Oh, how I miss my online friends!

I'm at the quilting stage of the Southwestern Sunrise-Sunset quilt, but it's not yet finished.  Here's the "walnut" quilting in the blank blocks.....
 and some of straight line quilting in the double Irish chain blocks.....
 with a lot more still to be added.  (Threads are from the basting that's not yet ready for complete removal.)

My maternal grandmother was amazingly superstitious and wanted a perfectly clean and tidy house for New Years Day.  I came close--with a shiny sink (I do love my new sink!) and stove top and all the crucial laundry caught up--but not to the point that I'd want a photographer in my house.  Sweet Teen spent New Year's Eve with a friend, but then they returned from Les Miserables so late that she decided to stay until yesterday afternoon.  That worked out fine because it gave me the chance to meet up with a long-time friend for lunch yesterday. Today she met another friend to go see another movie in Albuquerque, so I'm watching the snow fall, trying to update my blog, and hoping to get more quilting done.  Because of the presence of our Christmas tree, I moved the treadle to a different window, so I'm thinking that we'll take our tree down later today so I can move the treadle back to my bird-watching window.

Our schools don't re-open until Monday, so we've been enjoying our break and watching lots of movies. (One of my favorites was Amish Grace, although I cried almost all the way through it!  One of the women at church suggested we get a group together to watch it.  I don't think so!  Public blubbering is definitely not something I want to do!)   I've been doing quite a bit of fun cooking: beef bourguignon, chicken piccata, tortellini soup, turkey, several omelets, and cherry yogurt muffins, among other delights.  No photos, so I'll skip posting recipes.  Besides, with winter temperatures, I'll be doing quite a bit more cooking, although I'm still fascinated by the fact that cooking for people I love is so much fun despite the fact that I don't enjoy cooking for the sake of cooking.

I've finally joined The Quilting Board.  My blog was getting a lot of hits from QB members who would then post questions on the quilting board about where I had copied patterns instead of just posting their questions on my blog.  That's very disconcerting because I wasn't copying patterns from other people--and if I do, I will always give them credit.  The thing is, I've been quilting so long that my first templates were made of oak tag and sand paper.  I had to learn to look at quilts and draft the patterns.  I was living in Peoria, IL at that time, and the big main branch of the library downtown had less than a dozen quilting related books.  Therefore, to this day, although I've purchased dozens of books over the decades, almost every quilt I've made has been one I've designed myself, usually taking inspiration from vintage and antique quilts.  Over the holidays I found not only a photograph of the 1903 Oklahoma quilt that inspired Southwestern Sunrise-Sunset, but also a photograph of the quilt I made in the late 80's and early 90's based on the 1903 quilt.  I thought I had copied it exactly, but it turns out that I had done a variation for the border.  Although the 1903 quilt was blue and white, this new quilt is a closer copy except it's colors are very different.  When we can get the rest of our connectivity problems solved, I'll scan those photos of the 1903 quilt and the 1980's quilt and do a post about all three.

In the meantime, dear ones, stay warm, and happy quiltmaking.....

Wednesday, November 14, 2012

More of the Zig Zag Border

A bit later than I'd planned, here is a bit of the zig zag border I've been making for the Southwestern Sunrise Sunset quilt.

The top row shows several of the pieced 4.5 X 2.5 rectangles next to each other while the bottom row shows them sewn together.
The tutorial for how to cut and piece these is found here.
They could also be pieced in much larger sizes for rows or columns in a zigzag or chevron quilt top, although I do think that the larger the rectangles are, the more wasteful this method is.  I do have a whole plateful of waste triangles that will probably be donated to someone with kids for an art project.
This method is much faster than the traditional way I pieced them 20+ years ago.

Edit:  12-31-12  In response to questions and comments on the Quilting Board:  No, this is not "Strip Twist", and it was not copied from Bonnie Hunter of Quiltville.  It is a variation of the border on the 1903 quilt from Oklahoma that provided the inspiration for this quilt.  If I ever decide to copy other people, I'll give them credit.

I'm linking (yes, a bit tardy) to Connie's Free Motion by the River so you can view the accomplishments of others.....and not so tardily to Esther's WIPs on Wednesday and Lee's w.i.p. on Wednesday.

A couple of weeks ago my oldest brother brought his first truck load through on I-40 in over ten years.  We were able to meet at a local truck stop, and Sweet Teen snapped this photo (along with a couple of others that were even uglier!).  I'd hoped to bring him home with me, but due to the nature of what he was hauling, he could not leave the truck stop.  I had not seen him since my dad's funeral three years ago.  I have to admit that we are both aging. Our visit was too short, but it was still nice to visit. (Just in case you are wondering, George definitely inherited a lot of physical characteristics from both the Scheers and Shreves, not so much from the Seastroms.)


Happy quiltmaking,......

Sunday, November 11, 2012

Oh, My! and Zig-Zag Border Tutorial

 I'll fill you in on the "oh, my" later...but first the tutorial for making a zigzag border.  These dimensions are what I'm using for the Southwestern Sunrise, Sunset Quilt.  The 1903 Oklahoma quilt that has inspired not only this quilt but also another that I made over twenty years ago had a simple zig zag border.  The other day I found a photo of the original quilt, and I hope to scan it when I get a chance.  (We have a new router and some of our connectivity problems have been resolved.)

Since the patches of this Triple Irish Chain finish to two inches square, I'm coordinating the zigzag border by using pieces that will finish to the same size.  While for my first quilt I made the border of triangles and rhomboids drawn the old fashioned way with templates, I used speed methods to cut and piece this border. Yes, our methods have changed quite a bit in the last quarter century.  I remember carrying the pieces and border for that earlier Irish chain almost every where I went where I would have to sit and wait for a while.  I even remember putting the last pieces together as I sat waiting in the office of my optometrist in downtown Gallup.  In contrast, this border actually has more pieces but is totally machine made.

To make the triangles at the outer sides of the border, I cut squares 2.5 inches X 2.5 inches, and instead of rhomboids (some people just call them parallelograms), I used rectangles cut 2.5 X 4.5 inches (so the border finishes four inches wide).

Since the squares become triangles, I mark a diagonal on the squares, lay them on the rectangles, and sew on the marked line. 
 My tip for speeding the process is to layer four squares (which were already layered since they were cut from two layered 2.5 inch strips cut the width of the fabric). Since I like to work at my machine, I put the the four squares on a round of soft shape foam.  (I purchased the soft foam at the Dollar Tree--I used them to make manipulatives for my classroom, and this was a leftover circle.)
 I mark the diagonal through all four layers with an old tracing wheel.  (I don't know if these are still sold. [Update:  Cheryl says they are still available.] While I have a couple of vintage ones, I also have found some in thrift stores.)
 I layer a square on a rectangle and sew across the square. And actually, I sew just to the side of the marked line enable more accuracy when the square is folded.  I do chain one shape after another during this process.

 Then when I fold the square over, I get a more accurate seam allowance so the edges of the fabric all match.
 Then I trim just the the triangle that is the second [inside] layer to cut down on bulk but retain accuracy.
 I use the 4.5 X 2.5 rectangle to help me stay accurate.

Then I repeat the process at the other end of the rectangle.
 Because we wish to create this V-shape, we need to either stitch two sets in opposite directions or stitch pairs to form the V.  Because of the way this fabric was dyed, it made more sense to me to stitch the rectangles in pairs.
 Then the two rectangle units can be stitched together.  Because of the layers of fabric in this method, I press open the seam joining the halves of the chevron. When the fabrics in the V meet well, we know we pieced accurately.
 Above and below are closeups of how the thread runs just next to the marked line.
 I marked it the lines on these patches just to show you how I obtained accuracy.

On my vintage Singers and Necchis my marked line just kisses the inner edge of the presser foot.

I did stitch these in sets of two, pressed them from the front, and then trimmed out those inner triangles while watching a rerun of Downton Abbey--have some more to trim tonight as well.

I'll try to post a photo of a zigzag border strip tomorrow.

Okay, here are the "oh, my"s.

Oh, my, how wonderful to be working at a school where the culture is supportive of the students' efforts.
I do like my new job!

Oh, my, winter has arrived. We awoke to ice and snow this morning.  Not deep.  But it did lead to some accidents that kept I-40 closed for over four hours.  Fortunately, we were able to take Old 66 to church.
Low tonight is expected to be 11 F.--and when they predict 11, experience tells us it may well be much colder.  I'm thinking it's time to load the Christmas CDs into the player.  I have tomorrow off for Veterans' Day, but my daughter has school.

Oh, my, we do become accustomed to our conveniences.  Although I had spent well over an hour on the phone with a Wi-Power Technician a few nights ago, we were not able to get my computer connected with the new router.  So I've been playing around and gradually getting our devices back on-line.  Finally, this afternoon I was successful getting the laptop back on the network.  I'm sure I did nothing we hadn't tried countless times before, but this time it worked. A somewhat related "oh, my": When I visit blogs (something I haven't managed to do as much as I like lately), I notice that I'm identified as a "visitor from Oldsmar, FL.  That's the home of Wi-Power, but I live at least 1500 miles from there! (Update:  Wi-Power technician stopped by Monday a.m., and we added more cable and moved the router to a higher location.)

Oh, my, I do love old recipes.  One of my favorite comfort foods from my growing-up-days-on-the-farm was bread pudding.  The bread I made yesterday was not so great--affected by errands, bad timing, etc., so today I cubed it and am making bread pudding--which smells great, by the way!  On the farm we had bread pudding throughout the year, (because we always had chickens, milk cows, and plenty of eggs and milk) but for some reason at this point in my life, bread pudding and late autumn/early winter just seem to go together.  Whenever I have holidays, I seem to spend a good portion of the time cooking.  It's hard to get other people to comprehend that I really don't love cooking, but I do love cooking for people I love.

Thank you to all the Veterans who have protected our nation, too frequently at great personal sacrifice, and to our citizens who are willing to speak up and acknowledge them.

Happy quiltmaking......

Sunday, November 4, 2012

Tutorial: Replacing a Treadle Sewing Machine Belt

This weekend I replaced the belt on one of my treadles.
While the path for the belt is pretty clear cut, most of us do not have the wonderful little tool for joining the ends of the belt.  So, over the years, with the help of other treadle sewers, I've developed a process that works for me and may work for others.

While belts seldom need to be replaced, they do stretch with humidity and use, and sometimes can need to be shortened even after several years of use.  The last time I shortened this one, I did not do a very good job of making a hole and inserting the staple, and with the shortage of rain and humidity we've experienced this year, the belt shrunk and pulled a hole where one end of the staple was inserted.  The belt was then too short to be trimmed again (and is available for postage to anyone who needs a shorter belt than my machine requires).

First I ran the belt through the complete path in order to cut it to the correct length.

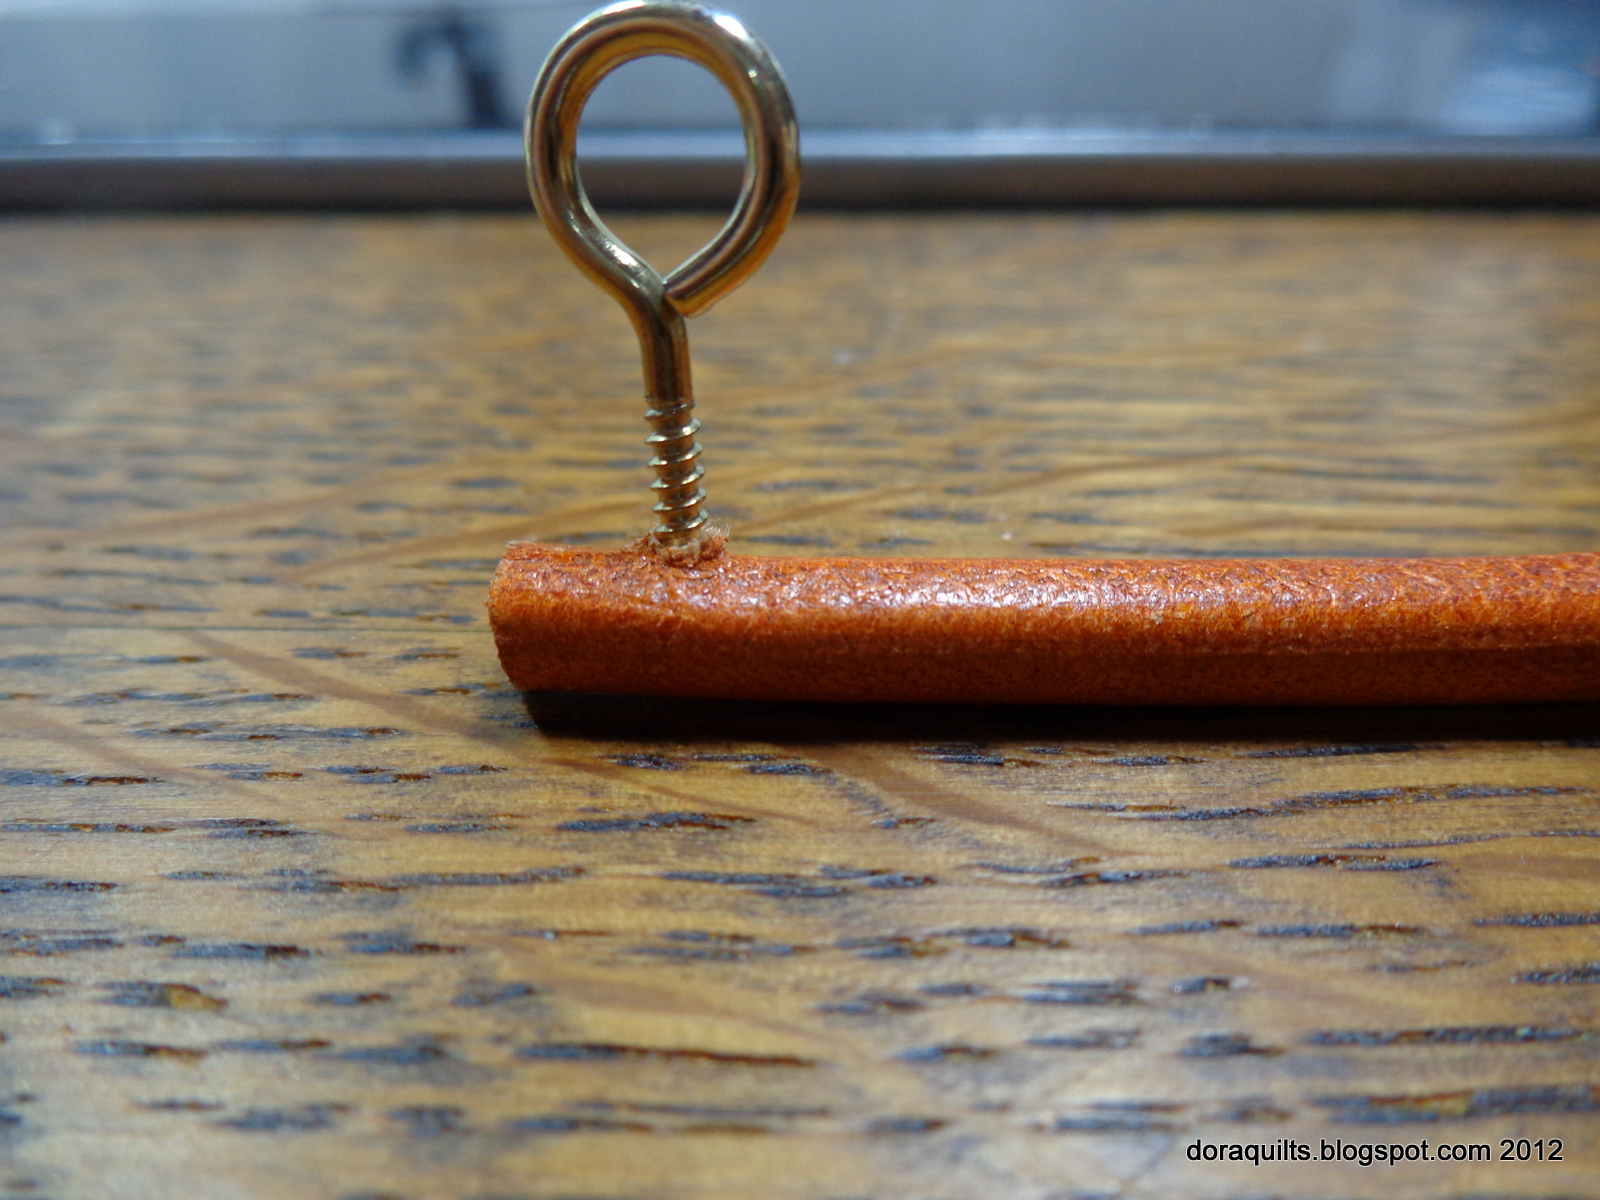
 These are the two little tools that help me pierce a hole.
 I first pierce a hole with a push pin, being very careful to center it and push it all the way through the belt.
 Then I screw a tiny o-ring all the way through the same hole in the belt...
flip the belt over and screw the o-ring through from the other direction.
 Then I inserted the staple through the hole and pinched it closed with a pair of pliers.
 I use bow rosin purchased from a music instrument store and....
with the belt engaged (and the needle unthreaded0 run the belt over the resin by treadling for a few seconds.

Any time the belt starts slipping, I reapply the rosin.

There is a very neat tool for piercing the hole, but since I have only two treadles, it seems unreasonable to spend about $40 on a tool...instead of fabric, thread or batting!

Happy quiltmaking......
Related Posts Plugin for WordPress, Blogger...